APRENDE Y REALIZA UNA CANASTA DE PASCUA PARA RECOGER LOS HUEVOS DE CHOCOLATE
Bienvenidos al blog de Nube de Papel Soy Mariela Carballo de La tienda
Petui Art (Personaliza tus ideas)
Me siento muy contenta de poder acompañarlos en este blog y espero puedan disfrutar del proyecto que hoy les traigo, me inspire y realice una canasta de pascua con los papeles de la colección Welcome Easter de Echo Park
Welcome to the Paper Cloud blog I am Mariela Carballo from The Petui Art Store (PERZONALIZE YOUR IDEAS) I am very happy to be able to accompany you on this blog and I hope you can enjoy the project that I bring you today inspires me and makes a basket with the papers of the Welcome Easter de Hecho ParK
Materiales
- cartulina-pliego-grande-esse-perlados-cacao-liso color marfil de 2 pulgadas * 35 cm
- cartulina-metalizado-espejado Cartulina dorada de 2 pulgadas * 35 cm
- Cartulina Marfil de 2 pulgadas * 46 cm
- Cartulina dorada de 1.5 pulgadas * 46 cm
- Redondo cartulina Marfil de 14 * 14 cm
- Cartulina Marfil de ½ pulgada * 55 cm
- Cartulina Dorada de ½ pulgada * 55 cm
- Papeles de la colección Welcome Easter de Hecho ParK
- Chipboard Accents: Welcome Easter – Echo Park
- Cizalla Mini Guillotina de Brazo We r
- Estilete
- Tacky Glue: Pegamento Multiuso 16 oz
- Pegamento doble contacto
- Tijeras Tim Holtz: Tijeras de mercería 5″
- Cinta o encaje ½ metro
- Regla, Lapiz Negro, Mat de Corte

- Materials
- 2 inch * 35 cm ivory color cartulina-pliego-grande-esse-perlados-cacao-liso
- 2 inch * 35 cm golden cardboard cartulina-metalizado-espejado
- 2-inch * 46cm Ivory Cardboard
- 1.5 inch * 46 cm golden cardboard
- Round 14* 14cm Ivory Cardboard
- 1/2 inch * 55 cm Ivory Cardboard
- 1/2 inch * 55 cm Golden Cardboard
- Papers from The Welcome Easter Collection by Hecho Park
- Chipboard Accents: Welcome Easter – Echo Park
- Shear Mini Guillotina de Brazo We r
- Stylet
- Tacky Glue: Pegamento Multiuso 16 oz
- Double contact glue
- Tim Holtz: Tijeras de mercería 5″
- Tape or lace 1/2 meter
- Rule, Black Pencil, Cutting Mat.
Iniciamos prendiendo el pegamento doble contacto en la parte de atrás de la cartulina elegida, para este trabajo
We start by turning on the double contact glue on the back of the chosen cardboard, for this job
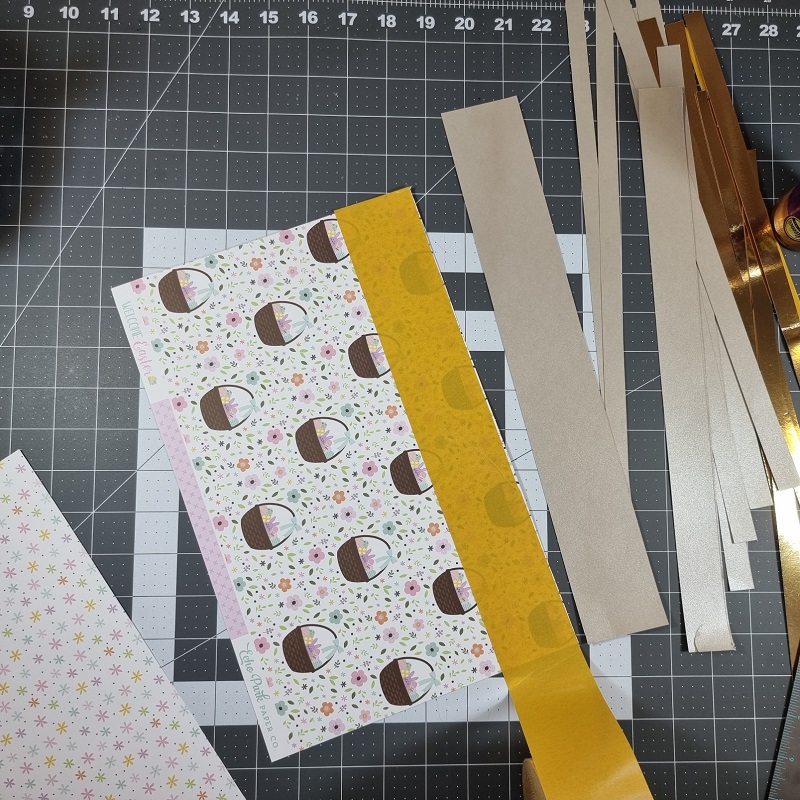
Luego cortaremos con estilete y regla las cartulinas en tiras más delgadas, tanto la de color marfil 4 unidades como la dorada 4 Unidades las cortamos en tiras de ½ pulgada * 35 cm. también cortamos 4 tiras marfil y 3 tiras doradas en tiras de ½ pulgada * 46 cm.
We will cut with stylus and rule the cardboard in thinner strips, both the ivory 4 units and the golden 4 Units we cut it into strips of 1/2 inch * 35 cm. We also cut 4 ivory strips and 3 golden strips into 1/2 inch * 46 cm strips.
Cortaremos con la cizalla 12 tiras de 30.5 cm * 1 cm con los papeles elegidos de la colección
Cortamos 8 Tiras de 1 cm * 5 cm con el papel de color de la colección
Cortamos 7 tiras de 15 cm * 1 cm con el papel de color de la colección
We will cut with the shear 12 strips of 30.5 cm * 1 cm with the chosen papers from the collection.
We cut 8 strips of 1 cm * 5 cm with the colored paper of the collection.
We cut 7 strips of 15 cm * 1 cm with the colored paper of the collection.

Prendemos las tiras de color de la colección que están cortadas de 1cm* 30.5 cm al centro de las tiras de color marfil y doradas de 35 cm* ½ pulgada, realizamos la misma operación para las tiras doradas y Marfiles de 46 cm* ½ pulgada. Podremos ver que nos quedan espacios de cartulina que los completaremos con los cortes que tenemos de 5 cm para las tiras de 35 cm y el de 15 cm para completar las tiras de 46 cm.
We light the color strips of the collection that are cut from 1cm* 30.5 cm to the center of the ivory and gold strips of 35 cm* 1/2 inch, we perform the same operation for the golden strips and Ivory of 46 cm* 1/2 inch. We can see that we have cardboard spaces that we will complete with the cuts that we have of 5 cm for the strips of 35 cm and the 15 cm to complete the strips of 46 cm.
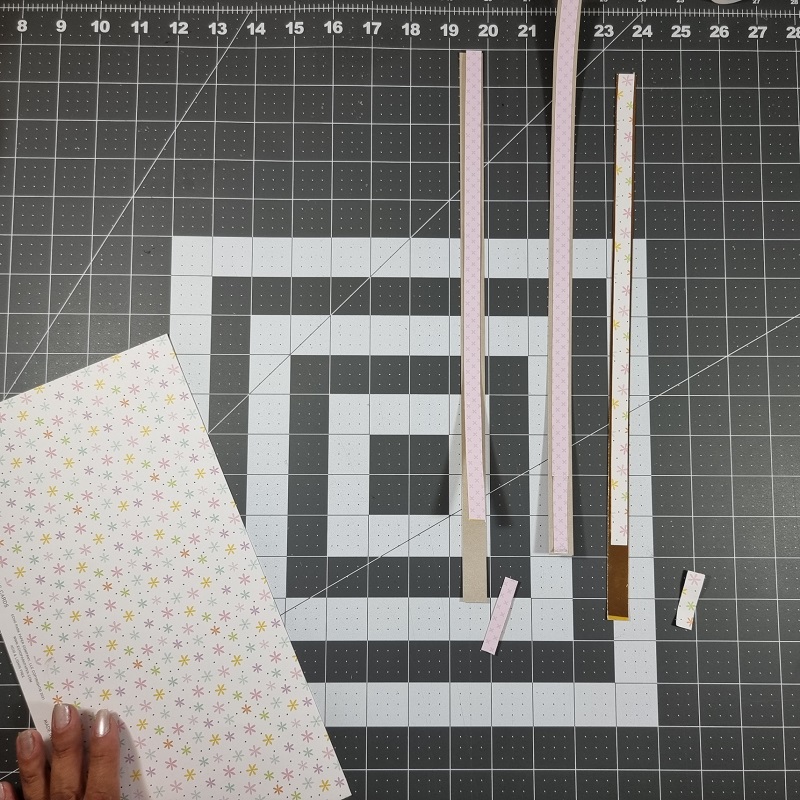
Una vez que tenemos todas nuestras tiras completas y decoradas empezamos a armar nuestra canasta de pascua
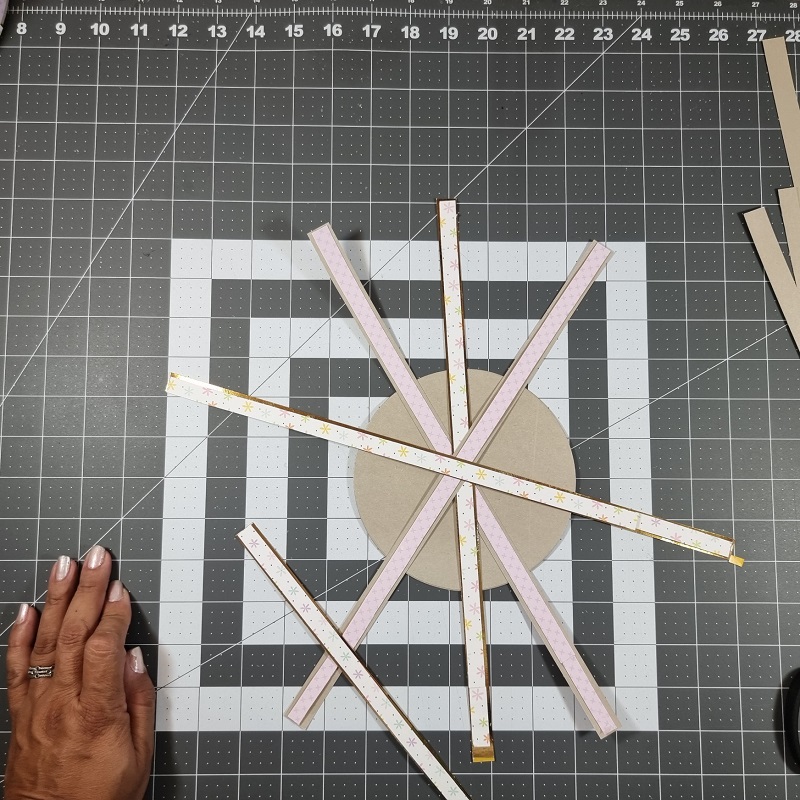
En el centro del circulo marfil de 14 *14 cm prendemos nuestras tiras de 1cm* 35 cm calculando o midiendo la mitad de las tiras y vamos intercalando una tira de cada color la primera como si fuera la hora 12:30 y la siguiente como si fuera la hora 9:15 luego vamos girando el redondo e intercalando los colores has prender las 8 tiras en el circulo
Once we have all our strips complete and decorated we start to assemble our Easter basket
In the center of the ivory circle of 14 *14 cm we turn on our strips calculation or measuring the mites of the strips and we interceding a strip of each color the first as if it were the time 12:30 and the next as if it was the time 9:15 then we turn the round and interspersing the colors you have ignited the 8 strips in the circle
Prendemos con Tacky Glue: Pegamento Multiuso 16 oz las puntas de las tiras de 46 cm * ½ pulgada ya decoradas para formar nuestro aro de la canasta estos son 3 aros dorados y 4 aros Marfiles
We light with tacki Glue the tips of the strips of 46 cm * 1 2 inch already decorated to form our hoop of the basket these are 3 golden rings and 4 Ivorian ring
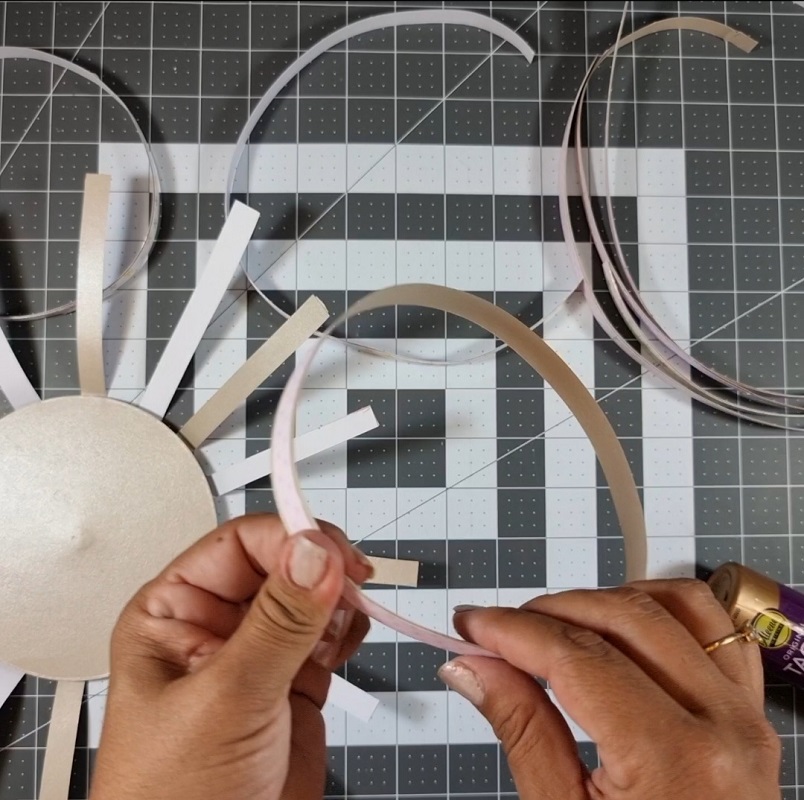
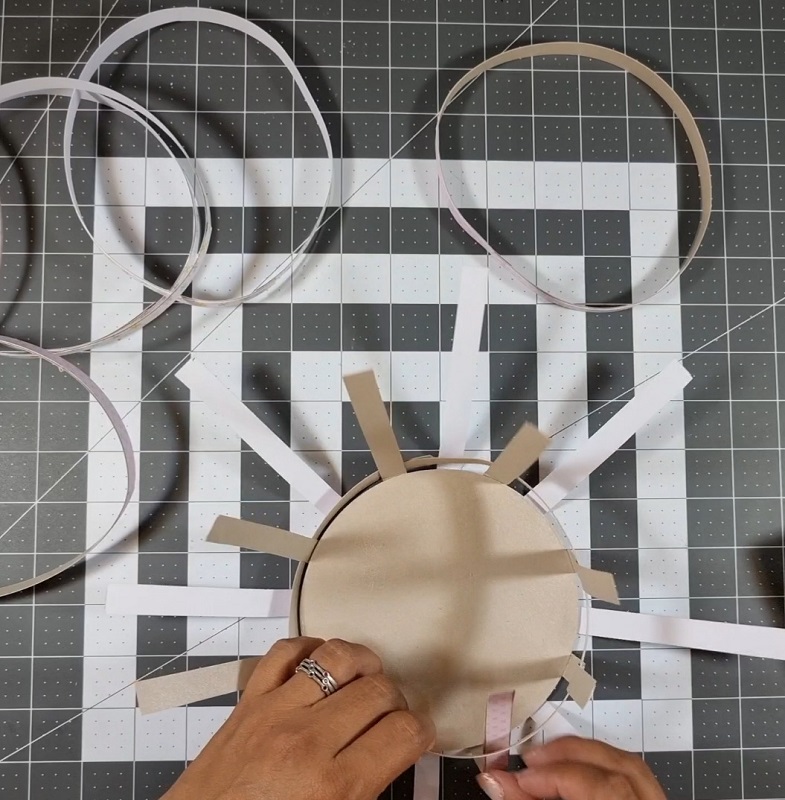
Comenzamos a armar nuestra canasta intercalando una tira de color marfil por dentro y la tira de color dorado por fuera, hasta completar la circunferencia y haber intercalado las 8 tiras prendidas en el circulo base, luego ponemos un aro dorado intercalando ahora las tiras que estaban por fuera van adentro hasta completar los 7 aros, 4 marfiles y 3 dorados….Terminamos y empezamos con el aro marfil.
We begin to assemble our basket interspersing an ivory strip inside and the golden strip on the outside, until we complete the circumference and have interspersed the 8 strips lit in the base circle, then we put a golden ring interspersing now the strips that were on the outside go inside until we complete the 7 rings, 4 iffers and 3 golds….We finish and start with the ivory hoop.
Armamos también la tira de 55 cm * 1.5 cm, que nos servirá para levantar nuestra canasta para lo cual prendemos a la cartulina marfil la cartulina dorada de 55 cm * ½ pulgada, y encima de esta tira prendemos una cartulina de color de la colección de 55 cm * 1 cm.
We also assemble the strip of 55 cm * 1.5 cm, which will serve us to lift our basket for which we light to the ivory cardboard the golden cardboard of 55 cm * 1/2 inch, and on top of this strip we light a colored cardboard of the collection of 55 cm * 1 cm.
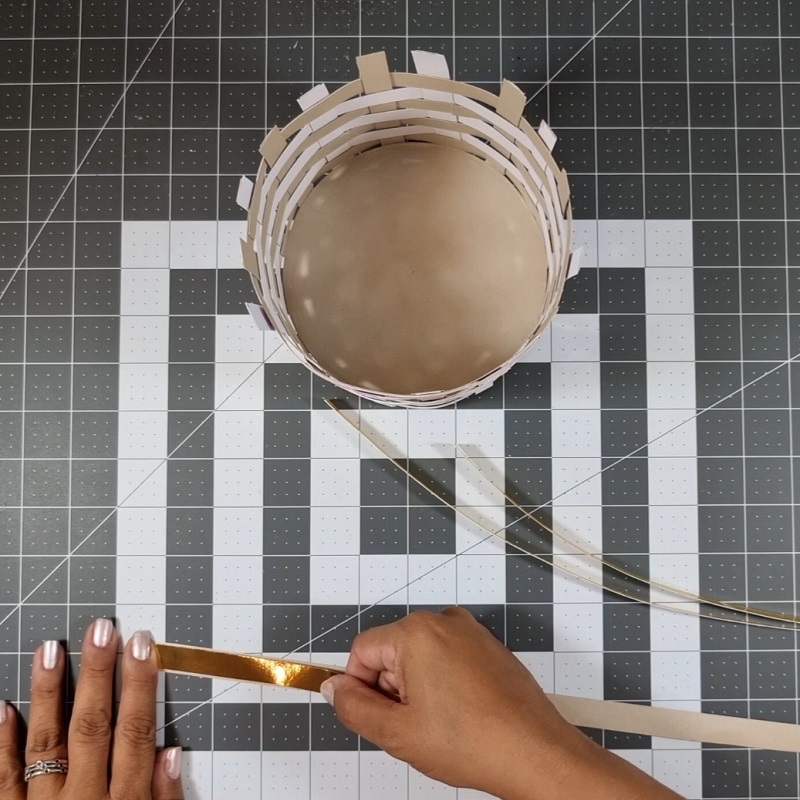
Una vez lista esta tira la prendemos a la canasta metiéndola en las tiras elegidas del mismo color dejamos que pase 1 cm en la base de la canasta para poder pegarla o prenderla con tacki Glue. Así le daremos mas soporte para poder cargar los huevos
Once this strip is ready, we light it to the basket by sticking it into the chosen strips of the same color, let it pass 1 cm at the base of the basket so that we can glue it or turn it on with tacki Glue. That way we’ll give you more support to be able to carry the eggs.
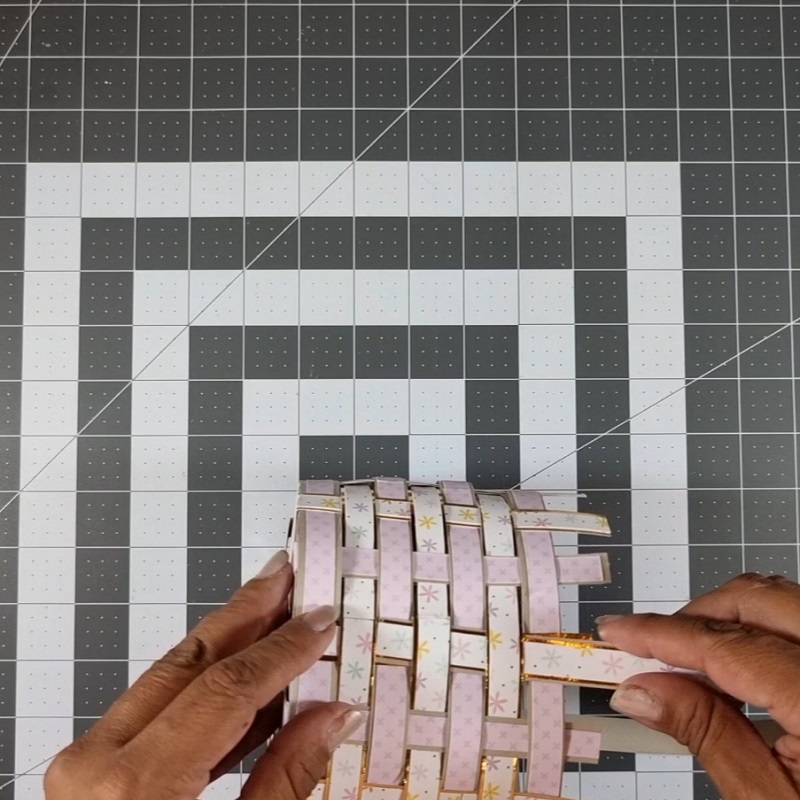
Prendemos las tiras de la canasta con Tacky Glue: Pegamento Multiuso 16 oz que terminan en el ultimo aro de color marfil y cortamos todos los pedazos de cartulina que sobresalen al aro, para darle un mejor acabado
We light the strips of the basket that end in the last ivory ring and cut all the pieces of cardboard that stand out to the hoop, to give it a better finish.
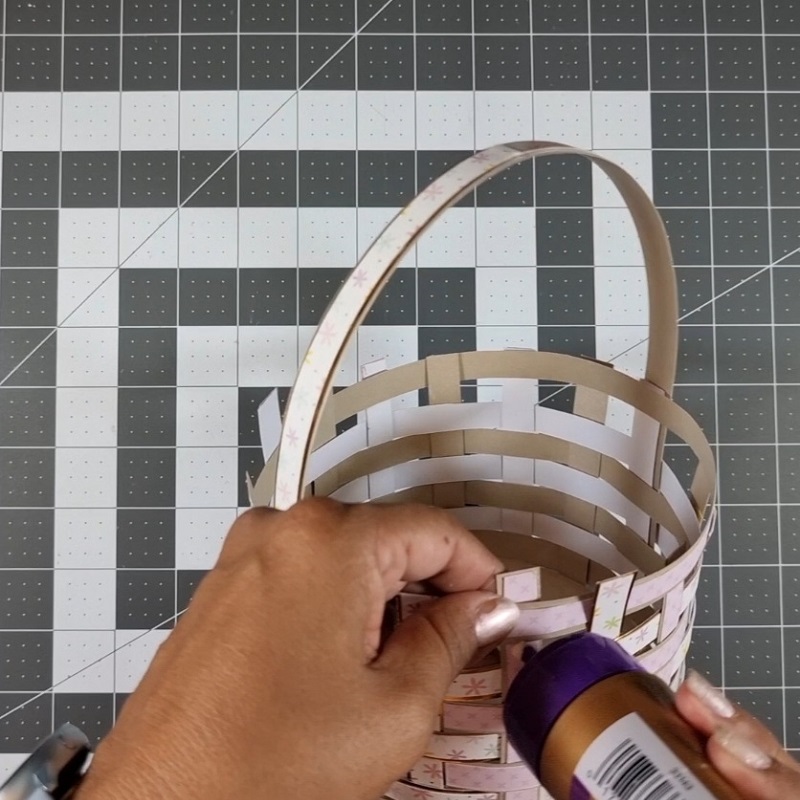
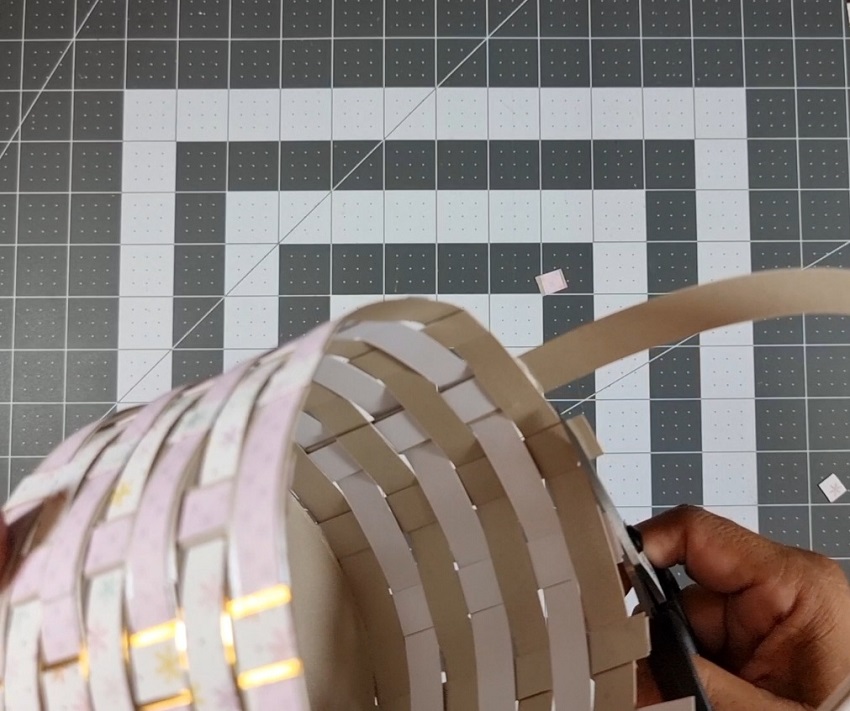
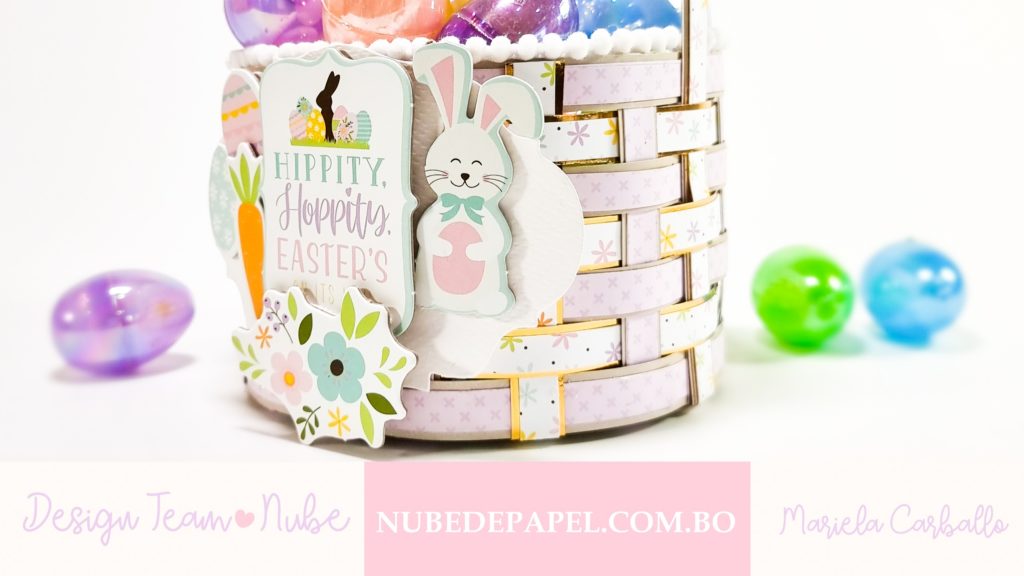
Así nos quedara nuestra canasta
That’s how our basket will look.
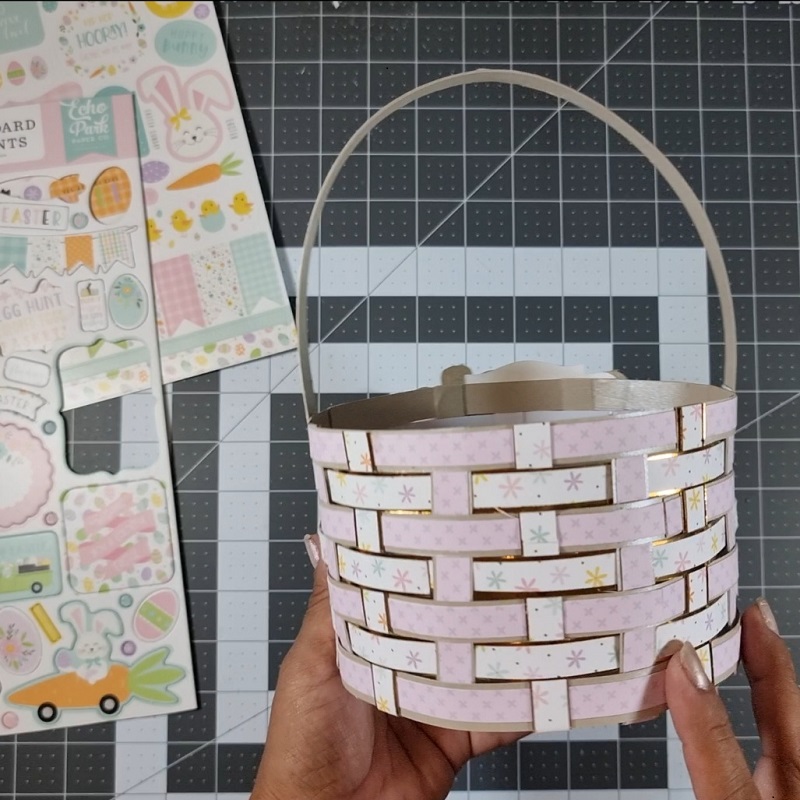
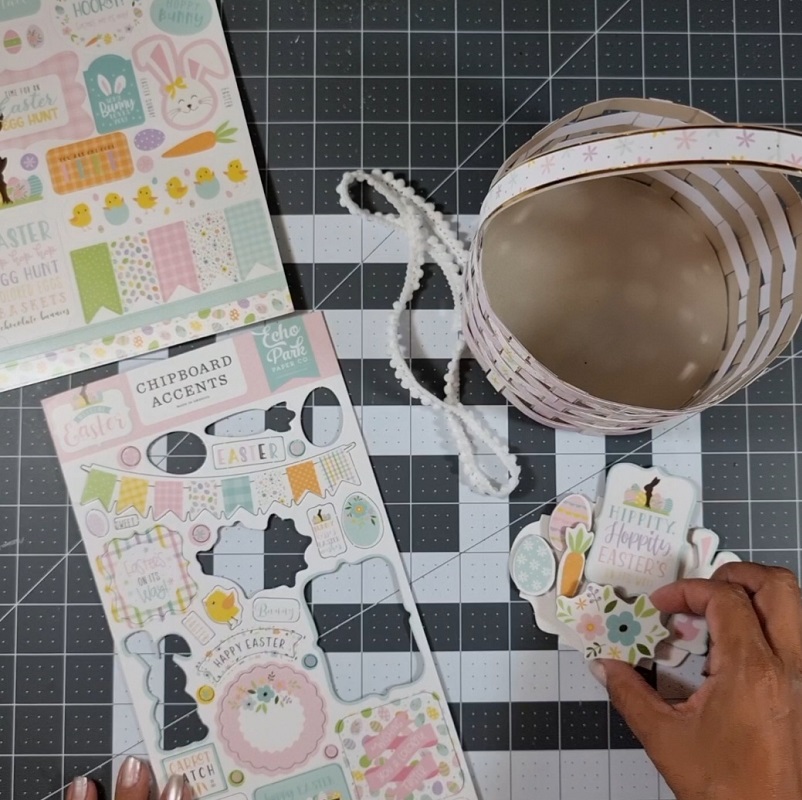
En un pedazo de cartulina troquelada ovalada o cortada en rectángulo armamos nuestra decoración de la canasta
Utilizando los chipboard de la colección Welcome Easter de hecho park prendidos con pegamento doble contacto
In a piece of cardboard cut oval or cut into rectangle we assemble our basket decoration
Using the chipboards from the Welcome Easter collection actually park on with double contact glue

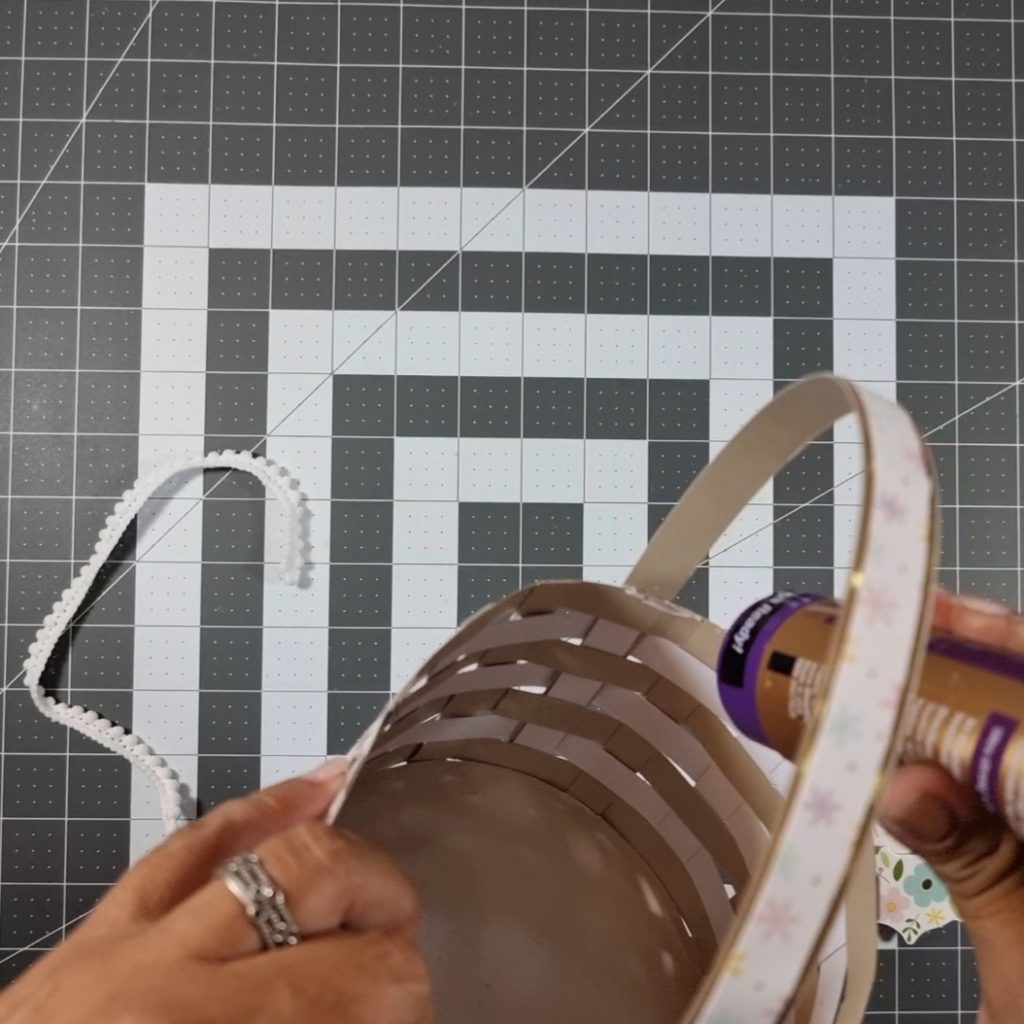
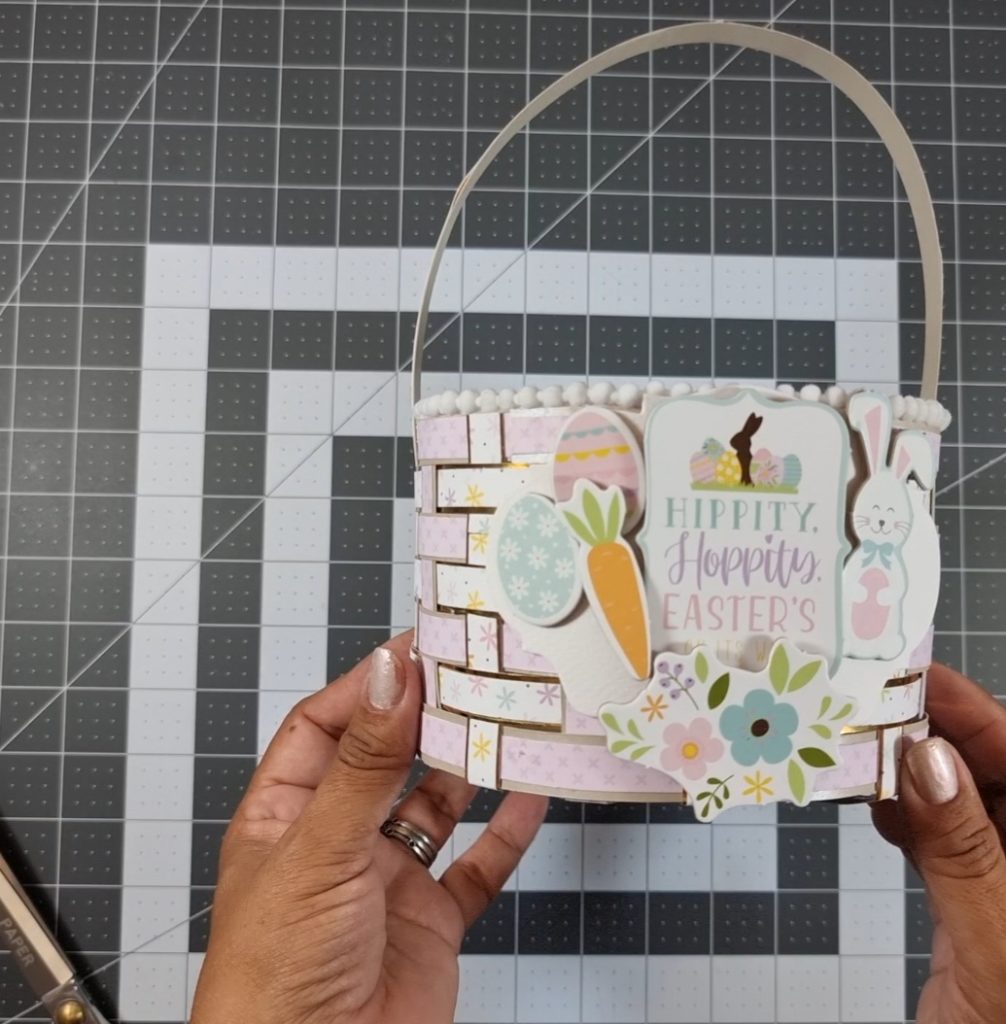
Finalmente podemos prender esta decoración a nuestra canasta, luego le prenderemos una cinta para decorar el borde quedando un detalle para darle un mejor acabado
Finally we can turn this decoration on to our basket, then we will light a tape to decorate the edge leaving a detail to give it a better finish
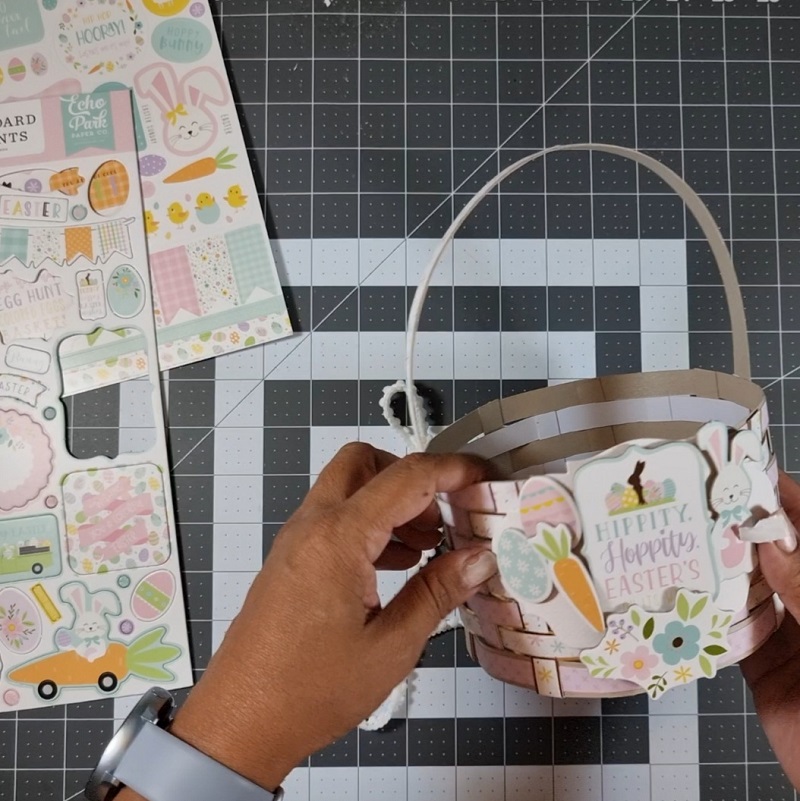
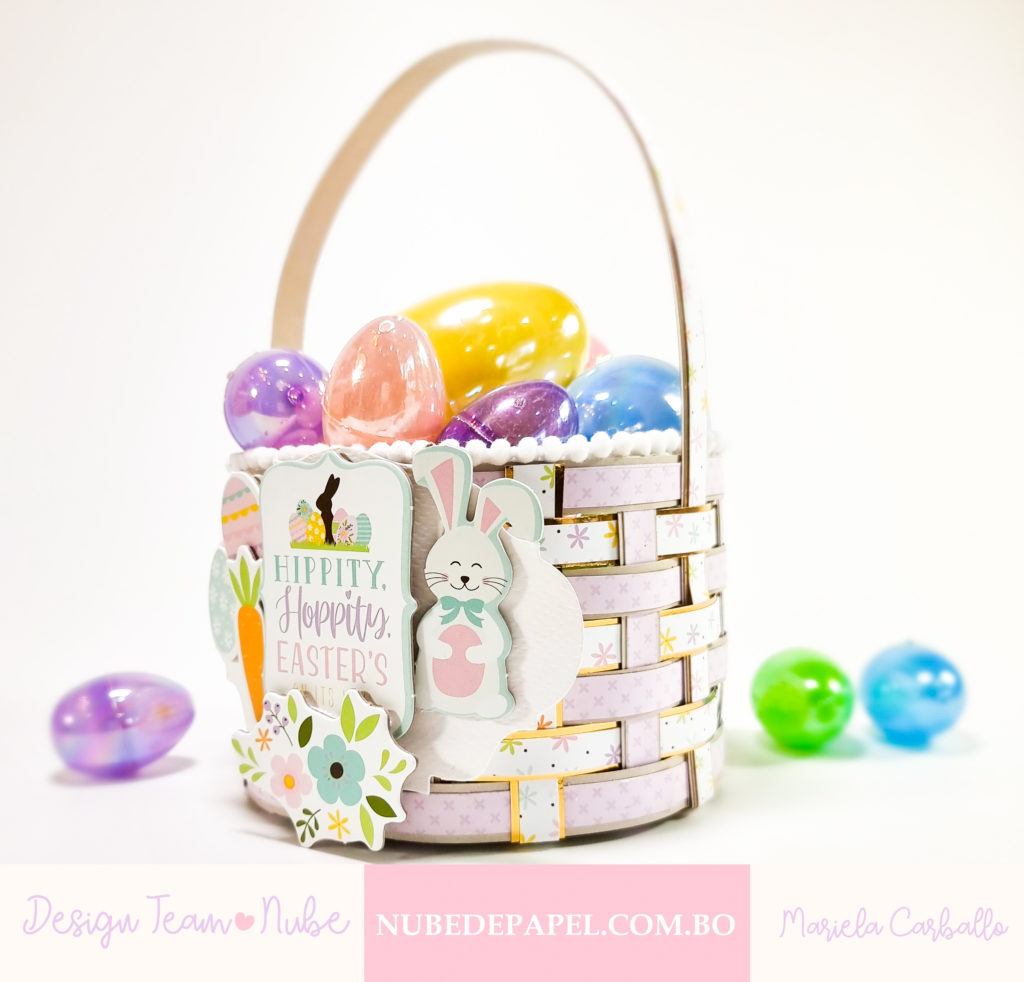
Este es el resultado de nuestra canasta de pascua esperamos que te guste y nos sigas en nuestras redes sociales que te compartimos a continuación.
This is the result of our Easter basket we hope you like and follow us on our social networks that we share below
Si gustas puedes hacer también la canasta para decorar tu mesa de pascua
If you like you can also make a basket to decorate your Easter table
Hasta pronto!
See you soon!

