Hola soy Mariela Carballo de Petui Art y les quiero contar que, las vacaciones me inspiraron a realizar unas tarjetas, con una herramienta muy útil el Aérografo Marcador Inalámbrico , este aerógrafo es muy simple y fácil de usar para pintar fondos utilizando esténciles, troqueles, viene acompañada de marcadores con lindos colores. Les mostrare 4 diferentes técnicas con la misma herramienta.
Hello I am Mariela Carballo of Petui Art and I want to tell you that, the holidays inspired me to make some cards, with a very useful tool the Aérografo Marcador Inalámbrico, this aerograph is very simple and easy to use to paint backgrounds using stencils, dies, is accompanied by markers with beautiful colors. I will show you 4 different techniques with the same tool.

MATERIALES
Aérografo Marcador Inalámbrico
Cartulinas A4 varios tonos
Cartulinas blancas de 17 * 13 cm
Stencil: Welcome Easter – Echo Park
Troqueles de Mariposas y redondo de 11 * 11 cm.
Troqueles de hojas y una rama
Palabras cortadas con troqueles
Pegamento doble contacto
Tijeras
MATERIALS
Aérografo Marcador Inalámbrico
A4 cardboards various shades
White cardboards of 17 * 13 cm
Stencil: Welcome Easter – Echo Park
Butterfly dies and round of 11 * 11 cm.
Leaf dies and a branch
Words cut with dies
Double contact glue
scissors
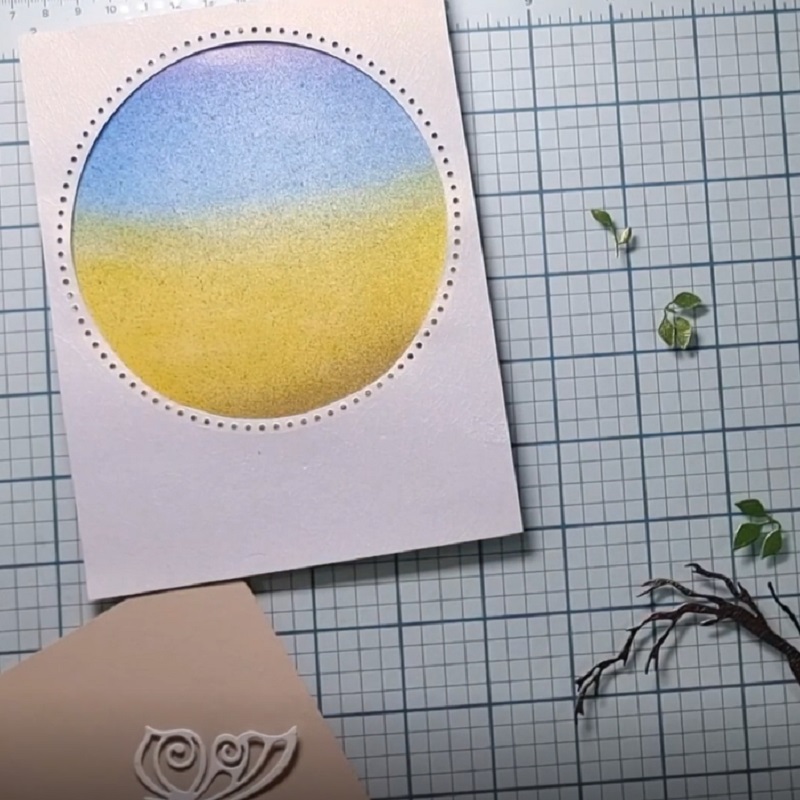
La cartulina blanca la cortamos con el troquel redondo, el redondo que obtenemos lo pintamos con el marcador celeste la mitad y luego amarilla en la parte superior le damos unos toques de Azul y en la parte inferior con café.
The white cardboard we cut with the round die, the round that we obtain we paint with the celestial marker half and then yellow at the top we give a few touches of Blue and at the bottom with coffee.


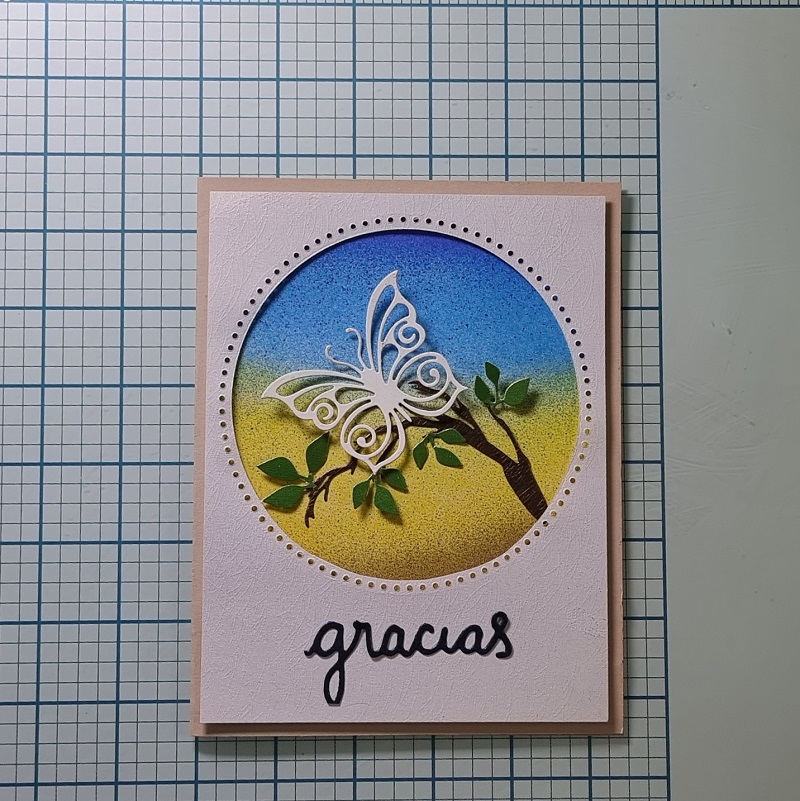
Con nuestras hojas la rama y la mariposa armamos el fondo de la tarjeta, luego prendemos con pegamento doble contacto la cartulina rectangular, cortada y troquelada con el redondo haciendo que tenga una dimensión y quede por encima del redondo armado para el fondo.
With our leaves the branch and the butterfly we assemble the bottom of the card, then we turn on with double contact glue the rectangular cardboard, cut and die-cut with the round making it have a dimencion and be above the round armed for the bottom.
Con el Stencil: Welcome Easter – Echo Park elegido, haremos la tarjeta sobre la cartulina blanca prendemos con un washi tape el esténcil, pintamos con el aerógrafo y el marcador de color café
With the elded Stencil: Welcome Easter – Echo Park, We will make the card on the white cardboard we light with a wasshi tape the stencil, we paint with the aerograph and the marker of brown color

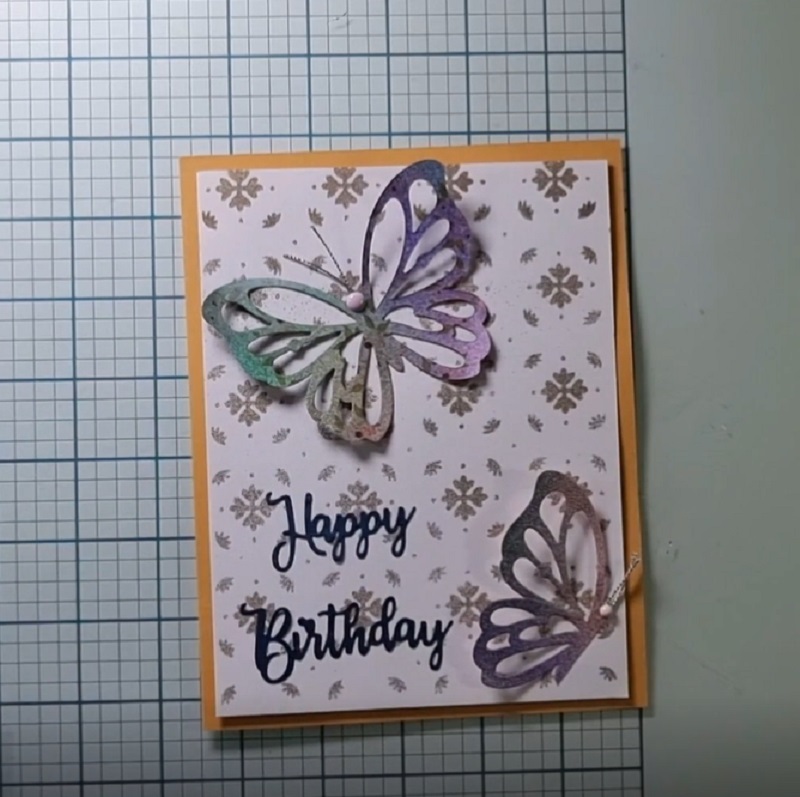
Prendemos sobre la cartulina de color elegida la cartulina puntada con el airbrush y luego decoramos con las mariposas y los Enamel Dots: Bunnies + Blooms para darle forma a la cabeza de la mariposa y sus antenas
We light on the chosen colored cardboard the cardboard stitched with the airbrush and then decorate with the butterflies and Enamel Dots: Bunnies + Blooms to shape the head of the butterfly and its antennae
Otra técnica es usar la cartulina blanca y pintarla con diferentes colores como el morado, verde, amarillo, rozado, azul, obteniendo un fondo colorido como base de nuestra tarjeta
Another technique is to use the white cardboard and paint it with different colors such as purple, green, yellow, rubbing, blue, op containing a colorful background as the basis of our card

Podemos observar la mezcla de colores y como se cubre totalmente todo el fondo blanco.
We can observe the mixture of colors and how the entire white background is completely covered.
Decoramos con la Mariposa troquelada y con las letras para dar un mensaje.
We decorate with the die-cut Butterfly and with the letters to give a message.

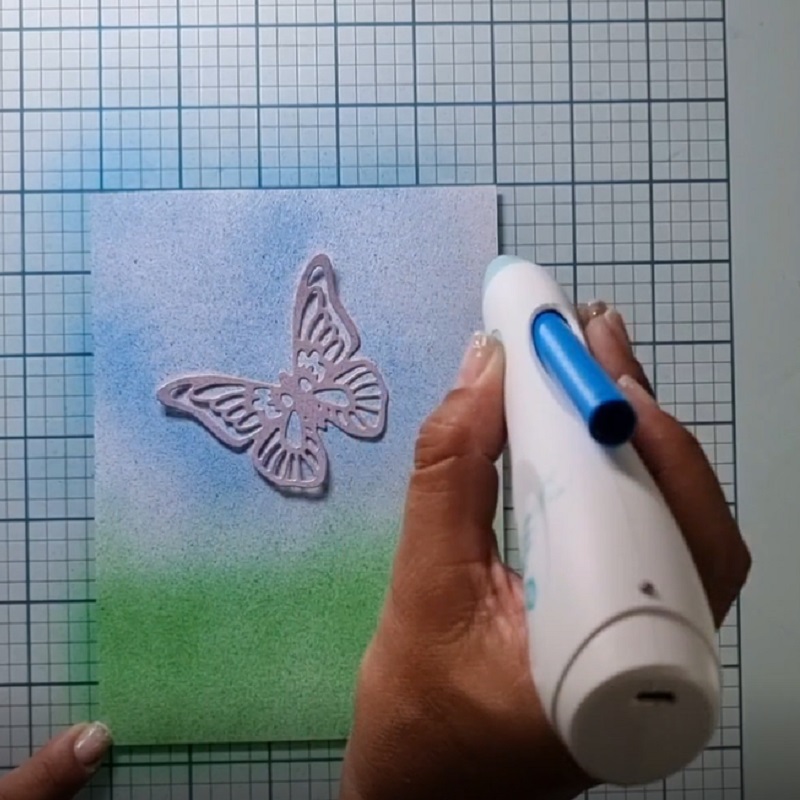
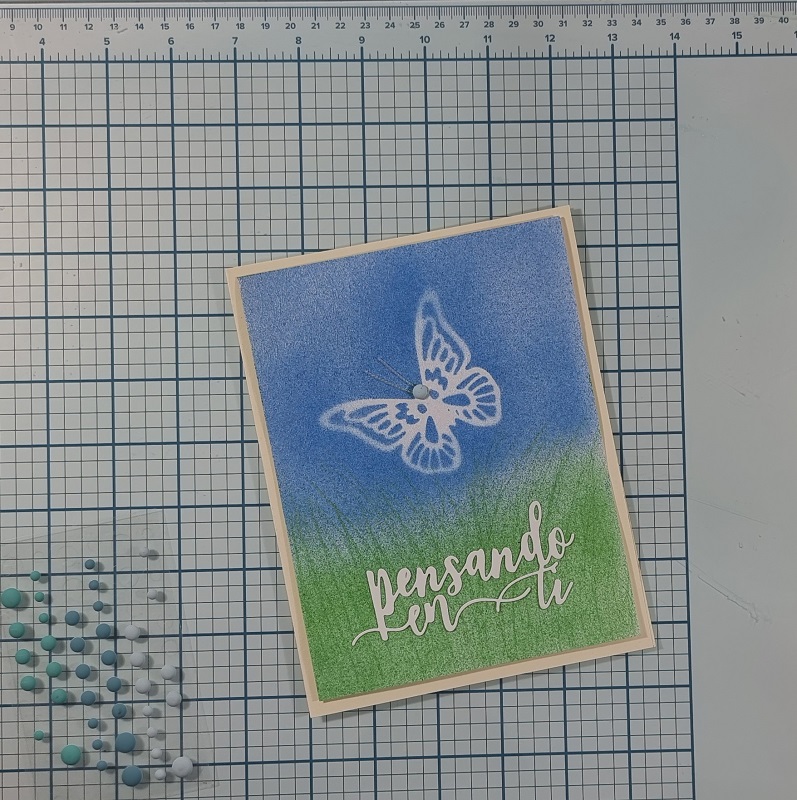
Podemos usar como otra técnica un elemento o mariposa ya cortado, que nos servirá de esténcil para poder marcar el fondo de la tarjeta y que quede pintada sin tener que pegarla, usamos un troquel de mariposa, y pintamos con el marcador celeste y verde
We can use as another technique an element or butterfly already cut that will serve as a sel to mark the background of the suit and that is painted without having to paste it, we use a butterfly die, and we paint with the blue and green marker
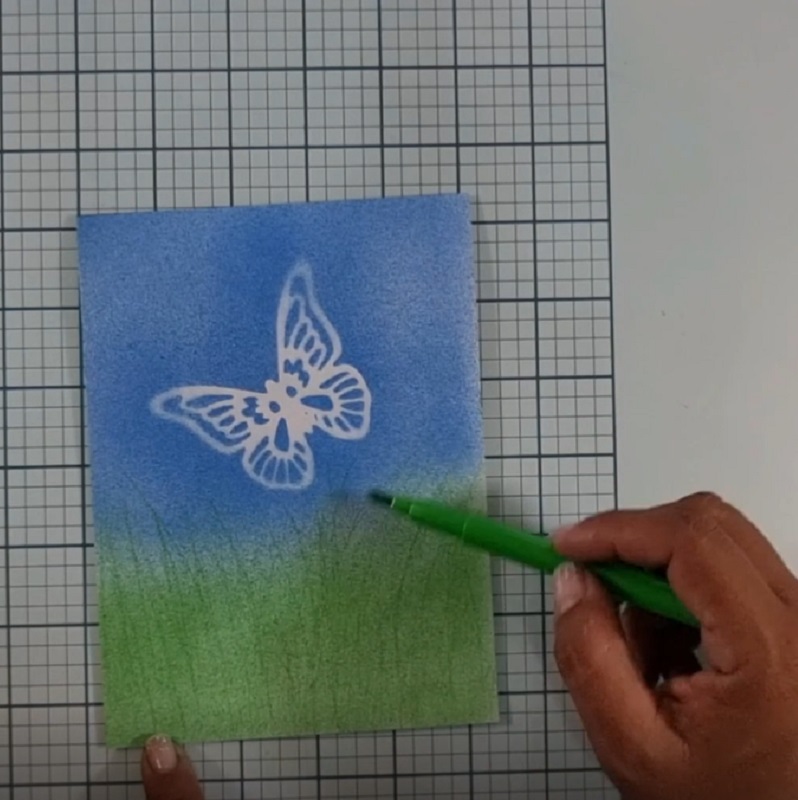
Una vez que tenemos el fondo. Con el mismo marcador verde pintamos unas líneas sobre el color verde para dar la impresión de que fuera pasto, o un jardín sobre el que esta nuestra mariposa.
Once we have the background. With the same green marker we painted a few lines on the green color to give the impression that it was grass, or a garden on which our butterfly is.
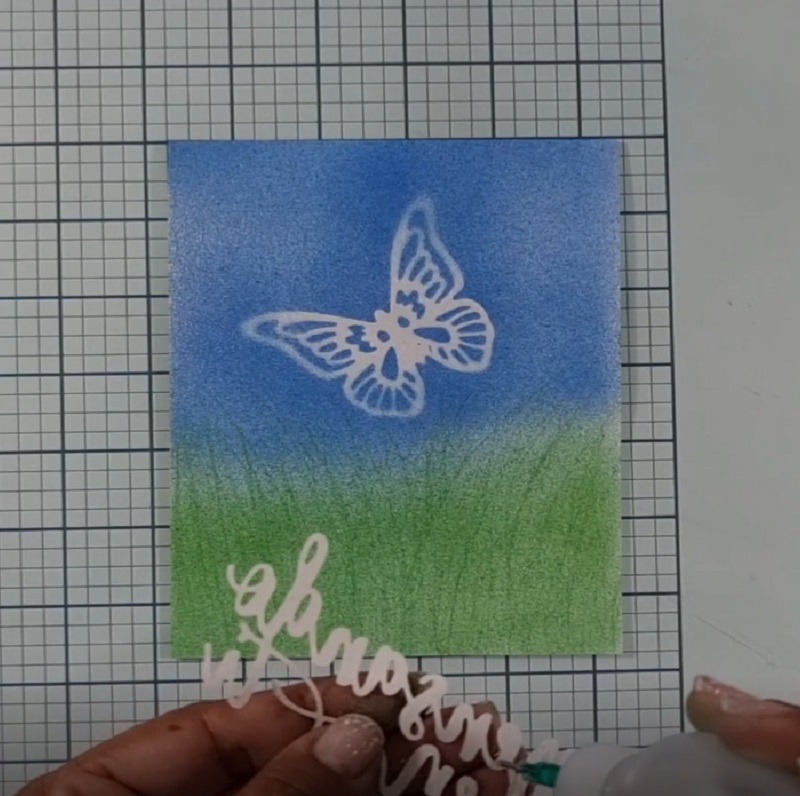
Prendemos este fondo en la cartulina y decoramos nuestra tarjeta con un mensaje
We turn on this background on the cardboard and decorate our card with a message
Espero que les guste estas técnicas que las pueden realizar los mas pequeños de la casa con los marcadores y el airbrush
I hope you like these techniques that can be done by the smallest of the house with the markers and the airbrush
Si te gusta puedes pasar por el canal de YouTube de Nube de papel para ver el video tutorial de estas tarjetas
If you like you can go through the YouTube channel of Nubede papel to watch the video tutorial of these cards

hasta la proxima
until next time